Welcome to ServLifts Official Website

Installing a Dumbwaiter: Who Does the Work, How Long It Takes, and What You Must Prepare
A dumbwaiter installation takes two to four days on site and two to ten weeks from delivery to certificate. Who installs it, what you prepare, and the eight steps.

A dumbwaiter installation is not one job. It is four jobs handed between three parties, and the handovers are where projects fail. The machine arrives finished, tested at the factory and crated; what changes between a three-day site programme and a three-week one is almost never the equipment. It is what the building hands over on the first morning, and whether anyone checked the licensing rules before the crate shipped.
This guide is written for the buyer who has signed or is about to sign, and now has to answer three practical questions: who physically installs the machine, how many days they will be on site, and what has to be true about the building before they arrive. It is also written to be disagreed with — several of the numbers below are ranges, because the honest answer to “how long does a dumbwaiter installation take” depends on conditions a supplier cannot see from a photograph. What can be fixed is the sequence, the division of responsibility, and the list of things that stop a dumbwaiter installation dead.
- What a Dumbwaiter Installation Actually Includes
- Who Installs a Dumbwaiter: Three Working Models
- Licensing Rules by Market: Who Is Allowed to Touch It
- What You Must Prepare Before the Crate Arrives
- The Dumbwaiter Installation Sequence in Eight Steps
- How Long a Dumbwaiter Installation Takes
- Six Repeat Failures in Dumbwaiter Installation
- The Acceptance Inspection and the Certificate of Operation
- Who Pays for What: Splitting the Installation Contract
- Dumbwaiter Installation FAQ
What a Dumbwaiter Installation Actually Includes
A dumbwaiter installation runs as four phases, and only one of them happens with the machine in the building. Buyers who budget for one phase and are invoiced for four are not being cheated — they were quoted a narrower scope than they assumed. Naming the phases before the contract is signed is the cheapest hour of the project.
| Phase | What happens | Normally owned by | Deliverable that closes it |
|---|---|---|---|
| 1. Pre-installation survey | Shaft measured, opening checked, power verified, access route and lifting points agreed, drawing set confirmed against the site | Buyer or main contractor, with supplier review | Signed layout drawing and a written site-readiness confirmation |
| 2. Mechanical build | Brackets, guide rails, machine, ropes, car, doors and interlocks fixed and aligned | Installation crew | Rails plumb, car running free, doors latching |
| 3. Electrical and commissioning | Panel mounted and terminated, safety chain proven, calls and levelling set, load test | Installation crew, often with a supplier technician on call | Test sheet signed by the person who ran it |
| 4. Acceptance and handover | Third-party or authority inspection, certificate issued, operator walk-through, documents handed over | Authority having jurisdiction, or an accredited inspector | Certificate of operation and the maintenance file |
Phase one is where most dumbwaiter installation projects lose their schedule, and it is the phase nobody invoices for. A shaft that measures 1,180 mm wide on site and 1,200 mm on the drawing sounds trivial until the landing door frame will not fit, because the door frame is the fixed item and the opening is the variable one. Our dumbwaiter installation specifications guide covers the numbers themselves; this page covers who does the work and in what order. The drawing set the crew actually builds from – construction sketch, dimensioned layout drawing and DWG – is set out in our dumbwaiter drawings guide.
Phase four is where projects surprise owners in a different way. In most jurisdictions the machine is not legally usable the moment the crew finishes. It is usable when a certificate of operation exists, and that certificate depends on an inspection that is scheduled separately, by a different organisation, on a different calendar. The 24 commissioning checks that come before that inspection are a separate job again, and they are the ones that produce the sheet the inspector asks for.
Who Installs a Dumbwaiter: Three Working Models
There are only three structures used for a dumbwaiter installation in commercial practice, and almost every quotation you will receive is one of them dressed differently. The choice is not mainly about price. It is about who is legally allowed to do the work at that address, and who carries the risk when an interlock fails its test.
Model A: Supplier-Supervised, Local Crew Executes
The supplier ships a factory-assembled machine with a layout drawing, a commissioning checklist and remote support, and a local lift company bolts it in. This is the default model for exports into markets where the equipment travels further than the technician does. It keeps the dumbwaiter installation cost inside the local labour rate, and it satisfies local licensing, because the crew that touches the machine holds the local qualification.
The failure mode is technical drift. A local crew that has installed passenger lifts for fifteen years will still find a food dumbwaiter unfamiliar in three places: the interlock geometry is smaller, the rope diameter is lighter and the controller expects a different test sequence. Supervision has to include an actual commissioning call, not a PDF.
Model B: Supplier’s Own Installation Team Travels
The supplier sends two or three technicians who install the machine themselves. For a difficult shaft, an unusual configuration or a first-of-type project, this is the cleanest route: the people who built the dumbwaiter commission the dumbwaiter. The trade is cost and visa logistics. Flights, accommodation, per-diem and travel days are real money, and in some markets a foreign technician legally cannot terminate the electrical installation even when he is the most competent person on site.
Model C: Main Contractor’s Lift Subcontractor
On larger projects the dumbwaiter installation is a line inside the lift package, executed by the same subcontractor who is installing the passenger lifts. This is administratively tidy and usually the fastest route through permits, because that subcontractor already has an account with the authority and knows the local inspector by name. The risk is attention: a food dumbwaiter is a small item in a large package, and a crew paid by the lift will finish the lifts first.
| Model | Best fit | Who carries technical risk | Typical schedule effect | Main weakness |
|---|---|---|---|---|
| A. Supervised local crew | Export projects with a competent local lift company | Shared — supplier for the machine, local crew for execution | Fastest to start, depends on local crew availability | Familiarity gap with dumbwaiter-specific details |
| B. Supplier team travels | Unusual shafts, first unit in a market, brand-critical sites | Supplier | Fixed and predictable once mobilised, slower to mobilise | Cost per site; licensing limits in some markets |
| C. Lift subcontractor | New-build hotels and hospitals with an existing lift package | Main contractor’s subcontractor | Slower in practice, fastest through paperwork | Priority — the dumbwaiter is the smallest item on their list |
Specifying the machine correctly before any of this begins is a separate exercise, set out in our dumbwaiter specification guide.
The question that decides between them is not “who is cheapest”. It is: who is permitted by the authority at that address to energise and test the equipment, and will that person still be reachable nine months later when the first fault appears. A dumbwaiter installation that passes inspection and then has nobody accountable is a completed job with an open wound.
Licensing Rules by Market: Who Is Allowed to Touch It
Every market answers this question in its own way, and the answer usually arrives too late — after the equipment has shipped. The pattern that repeats across jurisdictions is that the machine’s design standard is international while the right to install it is local. Two American examples show how specific the local requirements become.
In Minnesota, state rule 1307.0030 makes it unlawful to install a dumbwaiter without first obtaining a permit from the authority having jurisdiction, requires plans and specifications to be submitted with the application, and prohibits operating the equipment without a current certificate of operation issued after a valid inspection report. That is three separate gates, administered by the state, not by the supplier. The Minnesota elevator and related devices rules are worth reading in full precisely because they are unromantic about the sequence.
Wisconsin goes further into paperwork. Its plan review provision for elevators and dumbwaiters requires submitted materials to include a plan of the car and hoistway showing clearances, a plan of the machine room or control space, a cross-section through hoistway, pit and car with dimensions, guide rail size and support details, and landings showing door or gate types. That list is the practical definition of a complete submittal, and it explains why a dumbwaiter installation can sit for weeks before anyone lifts a spanner: the authority is waiting for a drawing, not a machine. The Wisconsin SPS 318.1007 plan review requirements set it out item by item.
Outside North America the split is usually between supply law and use law. In the United Kingdom, placing the equipment on the market is one question and using it at work is another; the second is governed by the Lifting Operations and Lifting Equipment Regulations 1998, which require thorough examination by a competent person at intervals set by risk. The HSE guidance on LOLER is the document an inspector will actually work from. In the Gulf and much of Southeast Asia the pattern is a municipal permit plus a licensed installer register, and in several markets the inspector attends the acceptance test in person rather than reviewing a report.
| Market | What is gated before installation | What is gated after | Practical check for the buyer |
|---|---|---|---|
| United States | Installation permit; plan review in many states | Acceptance inspection; certificate of operation; periodic inspection | Ask the local authority whether the dumbwaiter is classified as a conveyance at that address, before ordering |
| Canada | Provincial permit; drawings | Acceptance inspection; operating permit | Provincial, not federal — confirm the province, not the country |
| United Kingdom | Building Regulations approval where applicable; listed building consent where relevant | Thorough examination under LOLER at risk-based intervals | Confirm whether the unit is goods-only in use, not just on paper |
| European Union | CE marking and declaration of conformity at supply | National inspection regimes, which differ sharply between member states | Ask which national regime applies to the building, not which directive the machine meets |
| Gulf and Southeast Asia | Municipal or civil defence permit; registered installer | Attendance-based acceptance; periodic renewal | Confirm the installer is on the approved register before the crew mobilises |
Our dumbwaiter regulations guide collects the supply-side requirements market by market, which is the other half of the licensing question.
One conclusion about dumbwaiter installation licensing is worth carrying into every project: the licensing question has to be answered by the authority at the address, in writing, before the purchase order. A supplier can tell you which standards the dumbwaiter is built to. Only the authority can tell you who is allowed to install it there.
What You Must Prepare Before the Crate Arrives
Site readiness is the single largest variable in dumbwaiter installation duration, and it is entirely within the buyer’s control. The list below is the one we use when confirming a shipment date for a dumbwaiter installation, because a machine that arrives at an unready site costs more in storage and standing time than the preparation would have cost.
4.1 The Structural Opening and the Hoistway
Four typical project types and what each one demands on site are set out in our review of dumbwaiter installation sites.
The opening is defined by the door frame, not by the shaft. Build the opening to the frame’s outside dimensions plus the clearance the frame needs, and check the diagonal as well as the width and height — a parallel-sided opening with a 15 mm skew will not accept a square frame. The sill level matters more than buyers expect: the finished floor level on the landing side sets the door threshold, and if the landing is still to be tiled, the dumbwaiter installation will be finished before the floor is, and the door will sit below the tile.
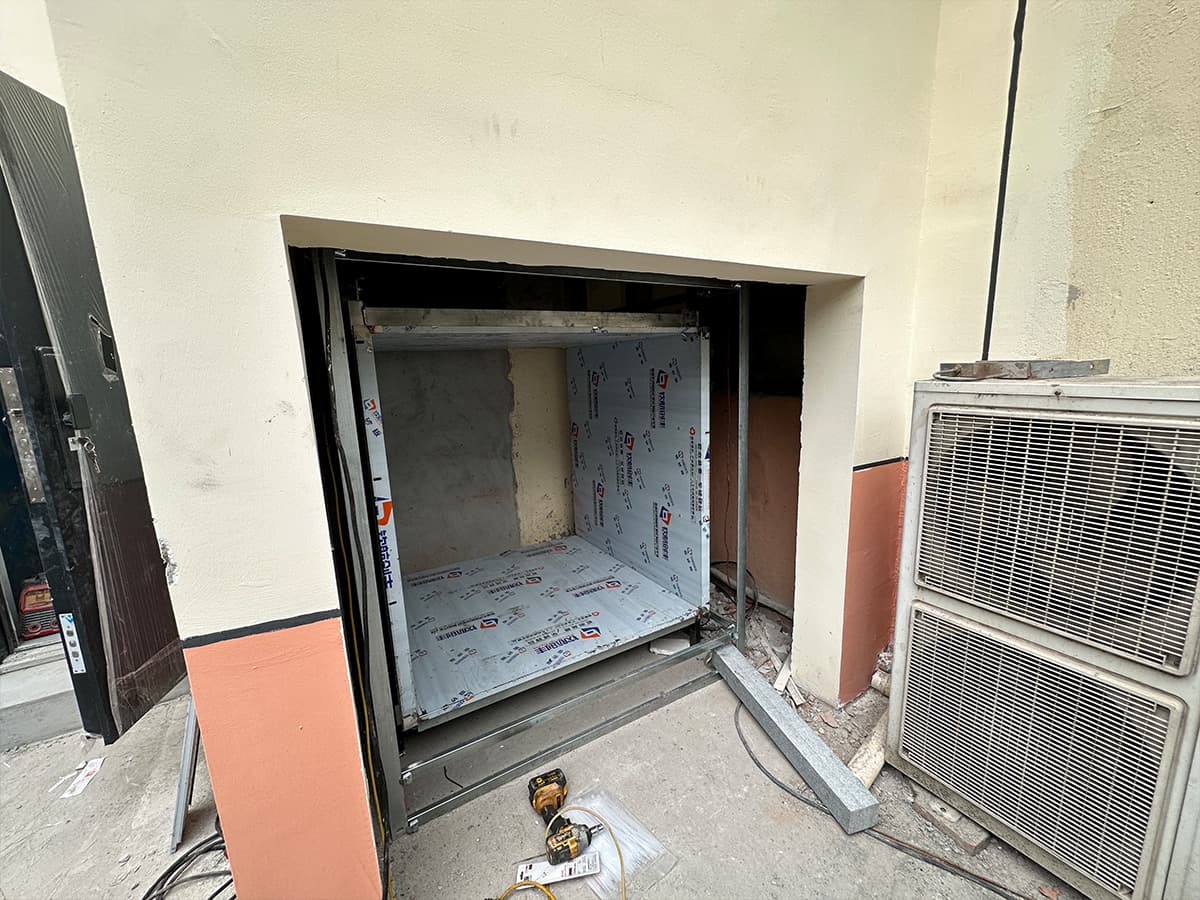
A landing opening in a brick service shaft. The clear opening after the frame is fitted, not the rough opening, is what decides whether a loaded tray goes in upright.
Inside the shaft, three dimensions govern everything downstream: the clear width and depth between finished wall faces, the pit depth, and the overhead clearance from the top landing to the underside of the roof slab. Our dumbwaiter dimensions guide gives the standard envelopes, and the low headroom dumbwaiter page covers what changes when overhead clearance is short, because that constraint reshapes the machine rather than the shaft.
4.2 Power, Earthing and Isolation
Power is the second most common cause of a stalled dumbwaiter installation, and it fails in a way that is easy to miss: the supply exists, but not at the right configuration. Confirm voltage, phase, frequency and the rating of the protective device against the drawing, and confirm that the isolator is inside the machine space rather than at the far end of a corridor. A locked electrical room two floors away is not a disconnection means for maintenance, and an inspector will say so.
Earthing deserves its own line. The control panel, the car frame and the shaft structure are all part of the protective bonding, and a shaft built from galvanised steel sections does not become an earth path because it is steel. The bonding conductor is specified on the drawing; confirm the electrician has seen the drawing.
| # | Condition to confirm before delivery | Who confirms it | What happens if it is missed |
|---|---|---|---|
| 1 | Opening built to the door frame’s outside dimensions, checked for skew | Main contractor / mason | Frame will not fit; opening has to be re-cut around a finished wall |
| 2 | Clear shaft dimensions, pit depth and overhead clearance measured as built | Site engineer | Car or counterweight fouls; rails cannot be set to plumb |
| 3 | Landing finished floor level fixed, including screed or tile | Main contractor | Threshold sits high or low; levelling range used up before handover |
| 4 | Power at the specified voltage, phase and frequency, with isolator in the machine space | Electrical contractor | Panel cannot be energised; commissioning postponed |
| 5 | Protective bonding conductor installed to the drawing | Electrical contractor | Fails electrical safety check at acceptance |
| 6 | Machine space clear of pipes, ducts and cable trays | MEP coordinator | No space to service the traction machine; relocating services after handover is expensive |
| 7 | Access route from the delivery point to the shaft wide enough for the largest crate | Site manager | Crate opened in a corridor; parts carried by hand and damaged |
| 8 | Lifting points or a hoist available above the shaft | Main contractor | Machine and rails manhandled, alignment suffers |
| 9 | Landings weather-tight and secure | Main contractor | Ropes, panel and rails sit in water before commissioning |
| 10 | Working area lit, with 230 V or 110 V site power available | Main contractor | Crew works by torchlight; schedule doubles |
The Dumbwaiter Installation Sequence in Eight Steps
The order below is the sequence we specify for a dumbwaiter installation, and it is not arbitrary. Each step depends on the previous one being right, which is why a crew that skips ahead spends the following day undoing work. For a standard two-stop food dumbwaiter with a two-person crew, a dumbwaiter installation runs through the eight steps in two to four working days on site.
Step 1 — Marking out and datum. Transfer the datum line from the layout drawing to every landing and to the shaft wall. Every later dimension references this line; a datum set once, wrongly, misaligns doors, sills and the machine together.
Step 2 — Brackets and guide rails. Fix the rail brackets, then the rails, then align them to plumb and to each other. Rail alignment is measured, not judged by eye, and it is the single largest determinant of ride quality in a dumbwaiter.
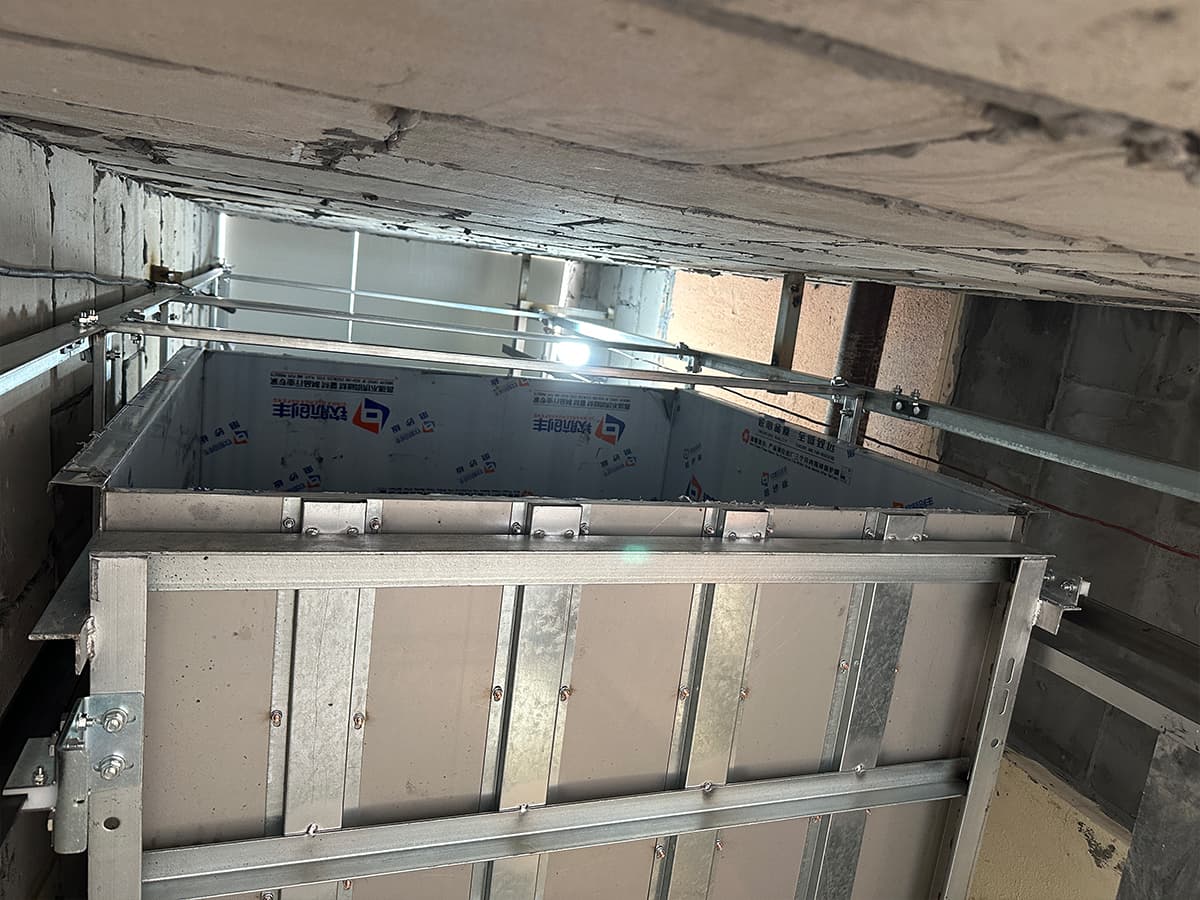
The car frame going together inside the shaft, with guide rails already set. Rails are aligned before the car is built, because the car is fitted to the rails and not the other way round.
Step 3 — Traction machine and counterweight. Mount the machine on its bed, then the counterweight frame and guides. On a bottom-drive low headroom layout the machine sits at the shaft base, which changes the access sequence and the order in which ropes are installed.
Step 4 — Roping. Terminate and tension the suspension ropes, then verify that the car and counterweight balance as specified. Rope tension that is uneven at this stage reads as noise and levelling drift two months later.
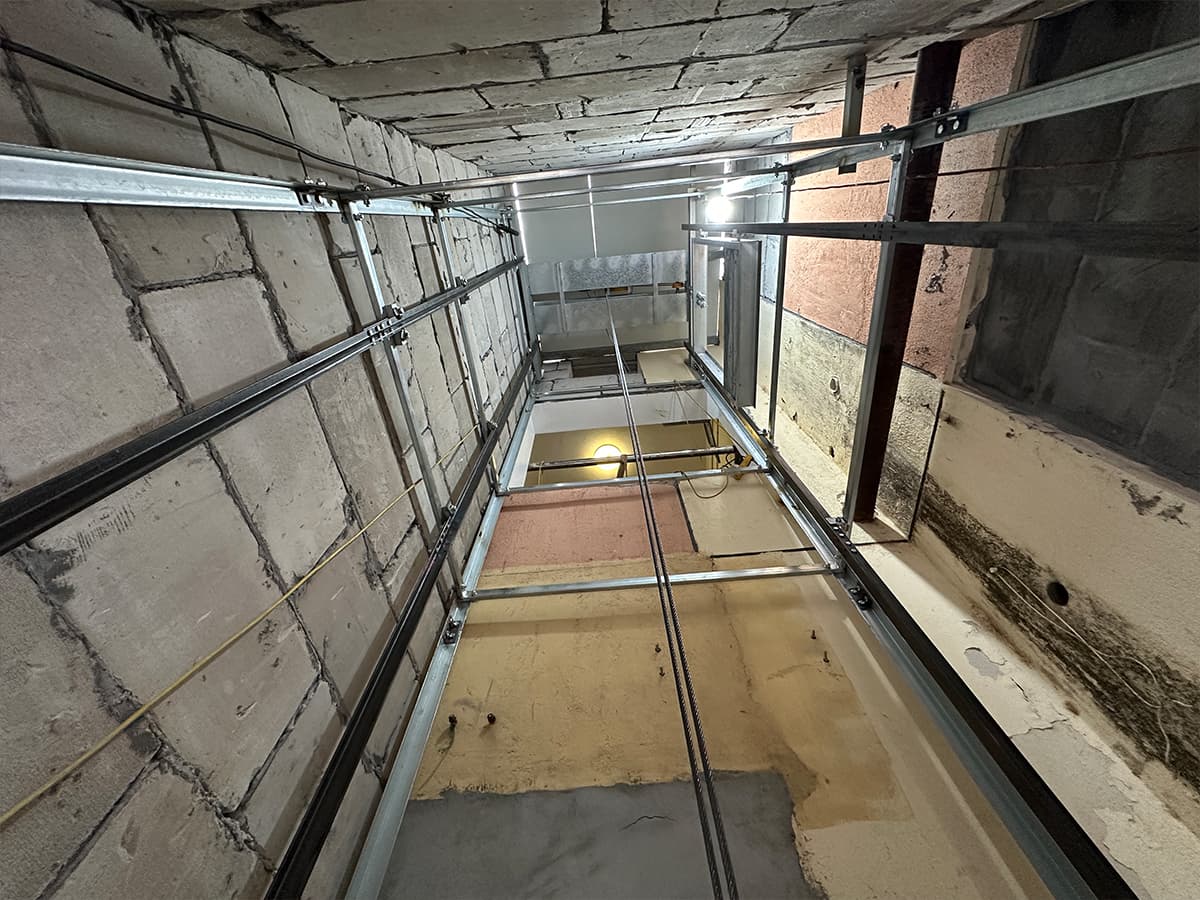
Suspension ropes through a multi-storey shaft during a dumbwaiter installation. Tensioning is done once, properly, rather than corrected repeatedly at commissioning.
Step 5 — Car assembly. Build the car on the frame, fit the car floor and the car door or gate, and set the clearances shown on the drawing. The internal car height is what most buyers care about, and it is fixed by the frame at this point, not adjustable later.
Step 6 — Landing doors and interlocks. Fit the doors and their frames, then the interlocks, then prove each interlock mechanically. The test is simple and non-negotiable: the car cannot move unless every door is locked, and no door can open unless the car is at that landing.
Step 7 — Wiring, panel and safety chain. Terminate the travelling cable, fit the control panel, and prove the safety chain end to end — every interlock, the slack rope switch, the overspeed device and the limit switches. This is the step where an unfamiliar crew most often needs remote support, because the chain is a logic sequence, not a set of wires.
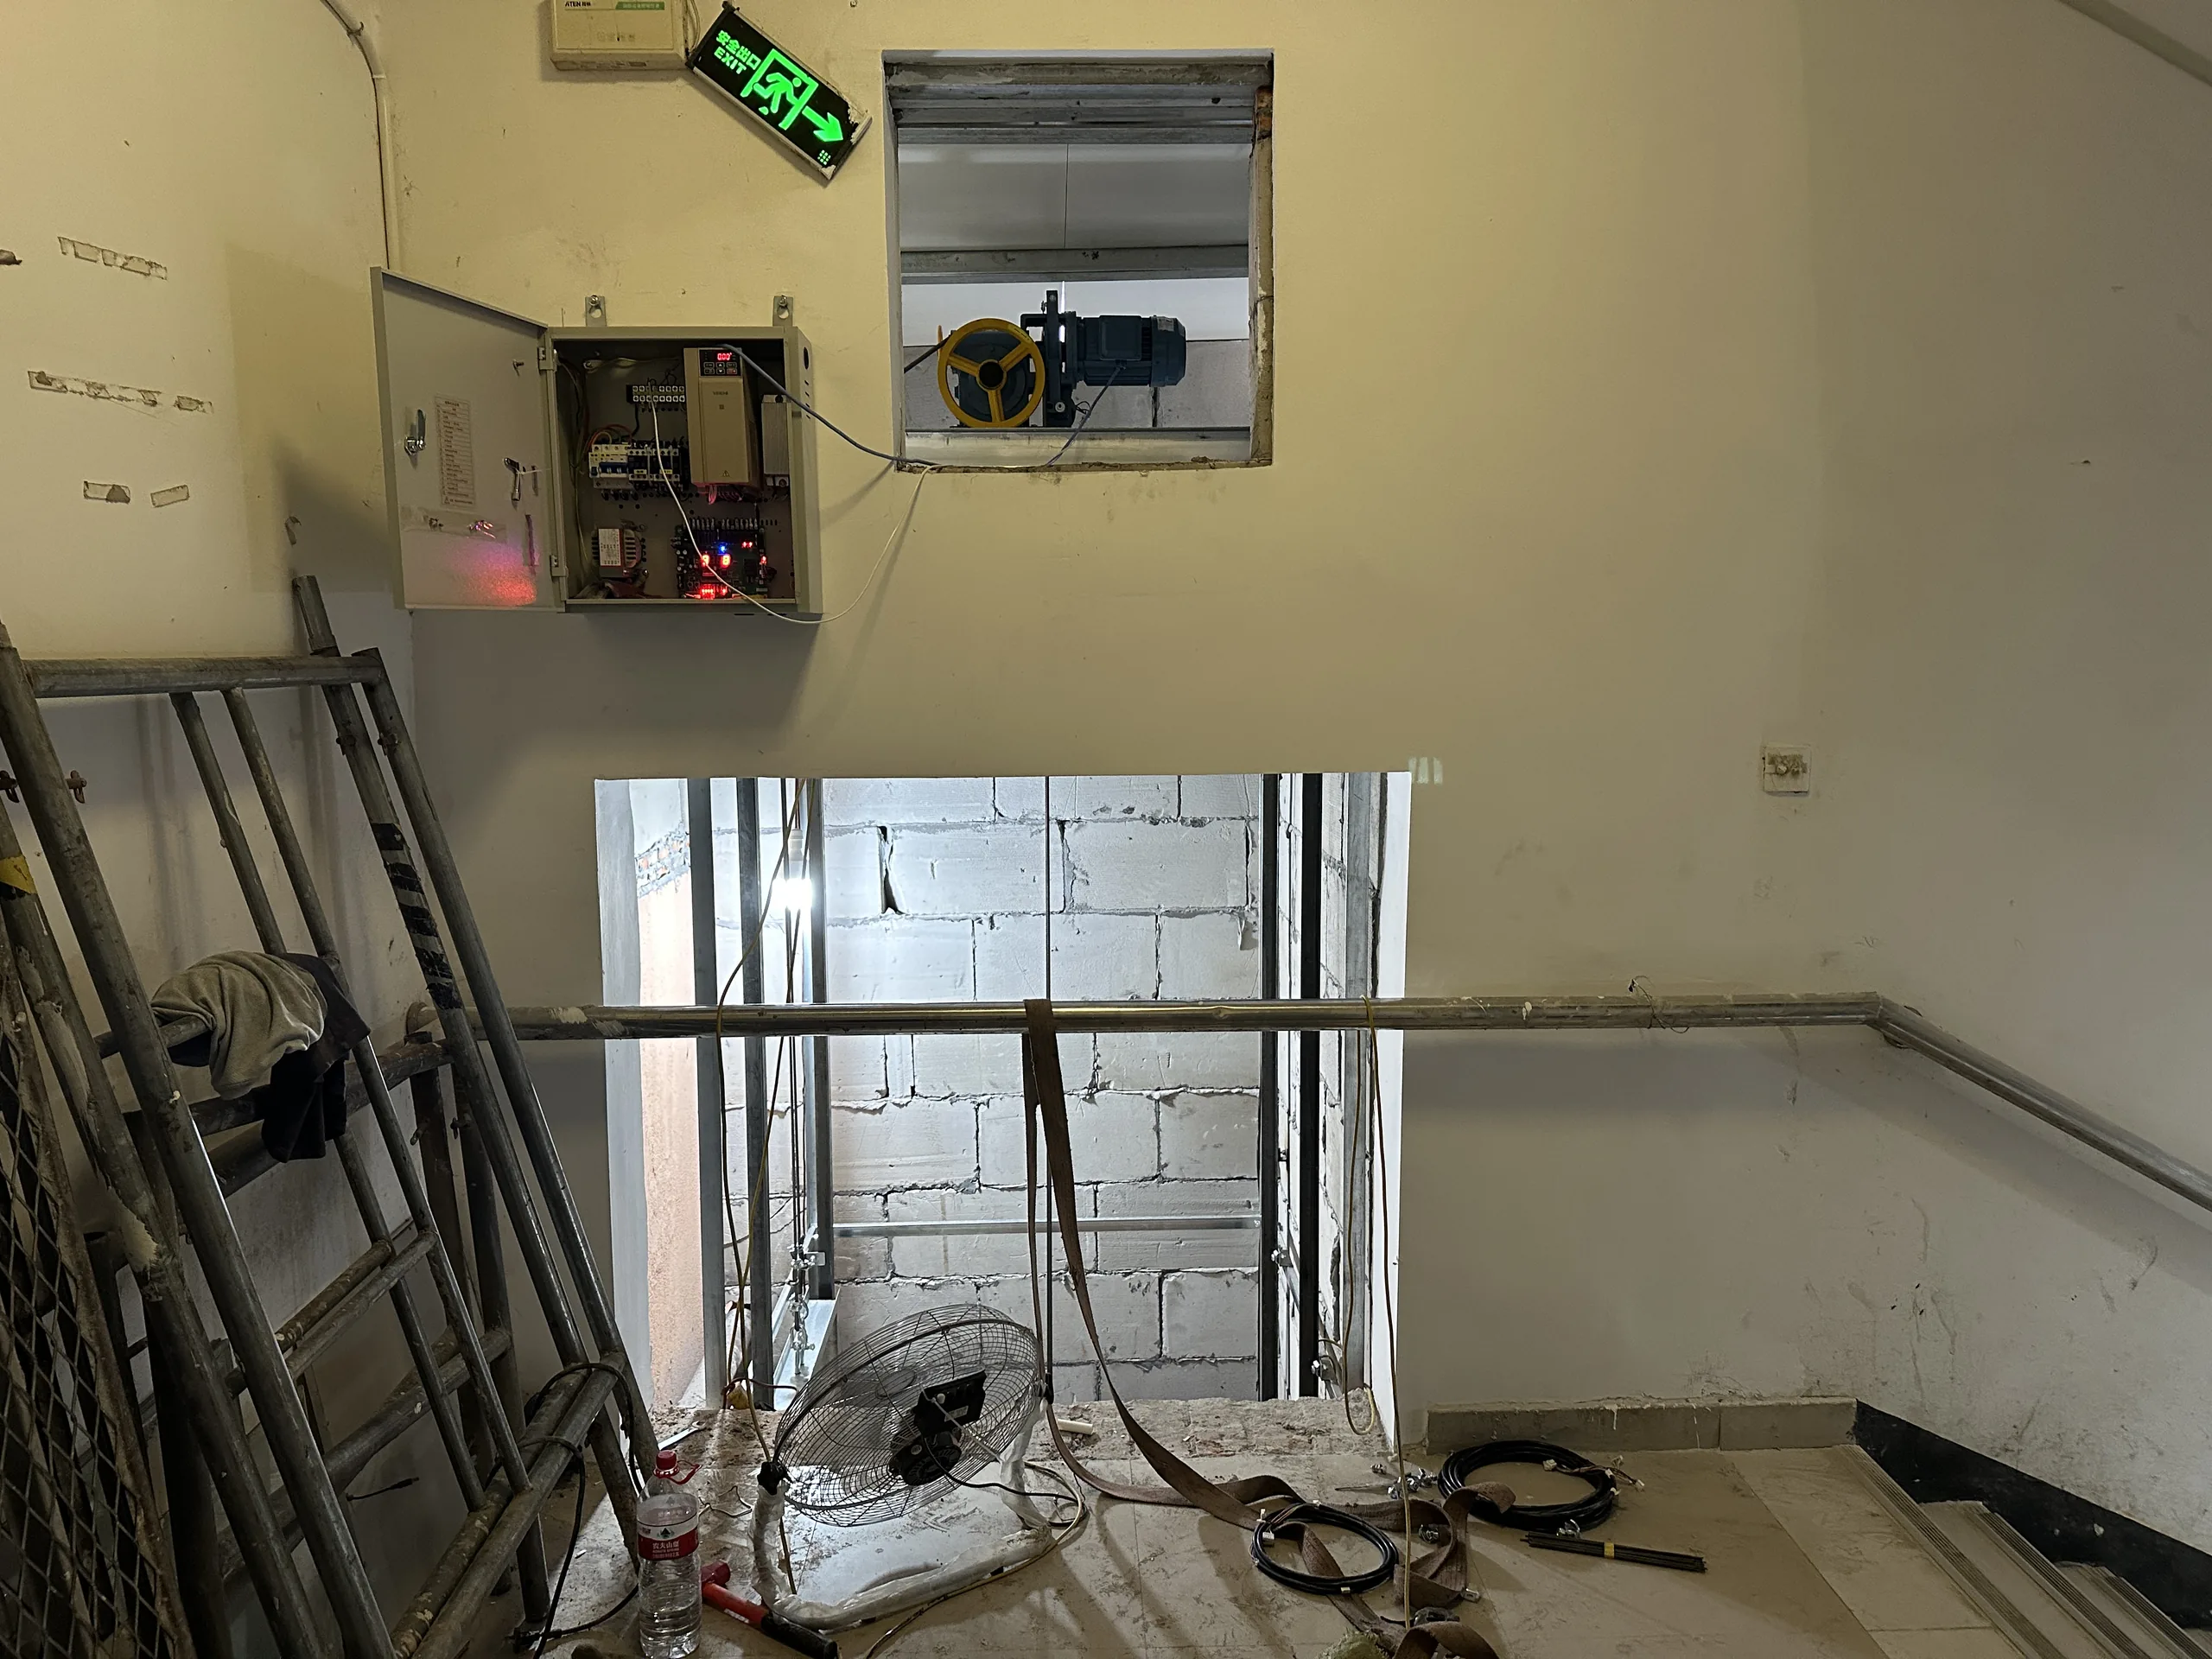
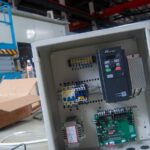
Control panel fitted on site during commissioning. The safety chain is proven contact by contact, not by pressing the call button and watching.
Step 8 — Testing and commissioning. Run the unit loaded to rated capacity, check levelling at every landing, verify the brake holds and applies on power loss, and record each result on the test sheet. A dumbwaiter installation is finished when the sheet is signed, not when the car moves.
How Long a Dumbwaiter Installation Takes
Two numbers in a dumbwaiter installation matter, and they are constantly confused. The first is site days: how long the crew is in the building. The second is calendar weeks: how long from delivery to a legally usable dumbwaiter. The gap between them is paperwork, and it is measured in weeks, not days.
| Scenario | Site days (two-person crew) | Delivery to usable, typical | What drives the gap |
|---|---|---|---|
| Standard two-stop food dumbwaiter, existing shaft, services ready | 2 to 3 | 2 to 5 weeks | Acceptance inspection scheduling |
| Three to four stops, new shaft, services ready | 3 to 5 | 3 to 7 weeks | Inspection scheduling, plus any drawing correction |
| Retrofit into an existing building, services to be relocated | 4 to 7 | 5 to 10 weeks | Sequencing with other trades; wall and floor making good |
| First unit in a new market | 3 to 5 | 6 to 12 weeks | Permit and registration of the installer, not the build |
Read the third column of a dumbwaiter installation schedule as the number that matters commercially. A hotel that opens on a date does not care that the crew was efficient for three days; it cares that the certificate exists. Three habits shorten the calendar gap on a dumbwaiter installation. Submit drawings for review as soon as the layout is confirmed, not when the machine ships. Book the acceptance inspection when the crew mobilises, not when it finishes. And confirm the installer’s registration at the same time as the purchase order, because a crew that is not on the approved register cannot request the inspection at all.
Delivery itself sits outside both numbers in a dumbwaiter installation programme. Our dumbwaiter lead time guide covers production and shipping, which for export projects is normally the longest single block in the programme and the one with the least flexibility.
Six Repeat Failures in Dumbwaiter Installation
These six failures repeat often enough across dumbwaiter installation projects that we now warn about them before the order is confirmed. None is exotic, and all are cheaper to prevent than to correct.
1. The opening is built to the shaft, not the frame. The rough opening is dimensioned from the hoistway, then the door frame arrives with its own outside dimensions and clearances. The frame is the fixed item. Build the opening around the frame drawing, and check the diagonal.
2. The power supply is right in voltage but wrong in configuration. A three-phase supply where the drawing calls for single-phase, or a 60 Hz machine offered a 50 Hz supply without a frequency check, produces a machine that runs wrong rather than not at all. Confirm voltage, phase, frequency and protective device rating in one written line from the electrician.
3. The machine space is occupied by other services. Pipes and cable trays are routed through the shaft head or the machine space because nobody flagged it as plant space. Servicing a traction machine requires access from a standing position, and that access has to survive the MEP coordination drawings.
4. Rails are set by eye. Alignment tolerance is a measurement, and a dumbwaiter with rails out of plumb runs, makes noise and wears guides. It passes a casual inspection and fails a careful one. Guide rails and their joints are one of the six sources covered in our guide to dumbwaiter noise.
5. The landing finish is decided after handover. Tile, screed or a raised threshold added later changes the sill relationship at every landing. Decide the finished floor level before the frame is fixed.
6. Nobody runs the load test before the inspector arrives. On a dumbwaiter installation, an overload device and a brake that have never been proven under rated load will be proven in front of the person who can refuse the certificate. Run the test yourself first, record it, and fix what it reveals while the crew is still on site.
The Acceptance Inspection and the Certificate of Operation
The acceptance inspection closes a dumbwaiter installation with a set of physical tests against the standard the machine was built to, performed by someone with no commercial interest in the result. For a traction dumbwaiter the tests that most often produce a finding are the door interlocks, the brake under rated load, the overspeed device, slack rope detection, overload protection and the buffers at the pit.
Prepare three things before the inspector arrives at a dumbwaiter installation, because each of them is requested in most jurisdictions. A signed test sheet from the installation crew, with the values actually measured rather than ticked. The layout drawing as installed, marked up where the site differed from the original. And the machine documents: declaration of conformity or equivalent, nameplate matching the model on the paperwork, and the maintenance instructions in a language the operator reads.
Once issued, the certificate for a dumbwaiter installation is not a permanent state. Periodic inspection follows on a schedule set by the jurisdiction, and a certificate lapses quietly. Our dumbwaiter inspection and maintenance schedule sets out the US, UK and EU intervals, and the dumbwaiter maintenance guide covers what a competent person actually checks. The distinction to hold onto is that a dumbwaiter installation and a dumbwaiter maintenance contract are two different purchases, bought from two different budgets, and only the first one ends with a certificate.
Who Pays for What: Splitting the Installation Contract
Most disputes around a dumbwaiter installation are not about workmanship. They are about scope: an item that both parties assumed the other had included. Three splits resolve the majority of them, and all three belong in the contract rather than in an email.
Making good is a building item, not a lift item. Cutting the opening, forming the shaft, fire-stopping, plastering, tiling and painting around the frame belong to the building contract. The dumbwaiter installation scope ends at the frame and the electrical terminations. Say this in writing, because the invoice for making good arrives after the crew has left.
The lifting and access equipment is a site item. Scaffold, hoists, cranes, forklifts and the labour to move crates are site provisions of a dumbwaiter installation. A crew that arrives to find no hoist will hire one at site rates and charge it back, and the chargeback will be correct.
The inspection fee is whoever the authority bills. In some jurisdictions the permit holder pays; in others the owner pays directly. Confirm which, and confirm who is named as the applicant on the permit, because that name is who the authority will contact when something is wrong.
One further clause is worth adding to a dumbwaiter installation contract even though it costs nothing: a written commissioning support commitment. Ask what happens on day one of operation if the panel shows a fault, who is called, in which time zone, and in what language. A dumbwaiter installation that is technically complete and practically unsupported has moved the problem, not solved it. Our dumbwaiter spare parts and after-sales page describes how that support is structured for units shipped from Wujiang, Suzhou.
Dumbwaiter Installation FAQ
How long does a dumbwaiter installation take on site?
A standard dumbwaiter installation, with a two-stop food unit, a two-person crew and a prepared shaft, takes two to three working days. Add one to two days per additional stop, and add time whenever services have to be relocated rather than connected.
Can my own contractor install a dumbwaiter?
Mechanically, often yes. Legally, it depends on the jurisdiction. Many authorities require the installation to be performed or supervised by a licensed lift contractor, and the permit application usually names that contractor. Confirm with the authority before committing, and note that an unlicensed installation can be ordered out of service regardless of how well it was built.
Does a dumbwaiter installation need a permit?
In most of the United States, Canada, the UK and the Gulf, yes — a permit before work starts and an inspection before use. Minnesota’s rule 1307.0030 is explicit that installation without a permit is unlawful and that operation without a certificate of operation is unlawful. Treat a supplier who says no permit is needed as a supplier who has not checked.
What power supply does a dumbwaiter installation require?
It depends on the model and the market: single-phase or three-phase, at the local voltage and frequency. The requirement is stated on the layout drawing and the panel nameplate, and it should be confirmed against the site supply in writing before the crate ships. A frequency mismatch is not correctable on site.
Can a dumbwaiter installation be done in an occupied building?
Yes, and an occupied-building dumbwaiter installation is common in hotels and restaurants. Expect dust and noise at the shaft, a working hoist or crane for a short period, and a landing closed for a day or two. Retrofit projects in occupied buildings typically add two to four site days over an equivalent new-build dumbwaiter installation.
What is the difference between installation and commissioning?
Installation is the physical half of the work: rails, machine, ropes, car, doors. Commissioning is proving that the assembled system behaves — safety chain, levelling, brake, overload, load test. Two different skill sets, often two different people, and the second one is what the inspector examines.
How soon can a dumbwaiter installation be used?
Only after the acceptance inspection and the certificate of operation, where those are required. Using it before that point is the specific act many regulations prohibit, and it also voids the position with insurers. The wait is normally inspection scheduling, so book early.
Do you supply installation drawings and support for a local crew?
Yes. Every unit ships with an installation layout drawing, a wiring diagram, a commissioning checklist and the test values to record, and our engineers support commissioning remotely in English. For projects where the local crew has not installed a food dumbwaiter before, we recommend a supervised first installation. Send the shaft dimensions, the number of stops and the destination country through our contact page and we will confirm the drawings and the installation model that fits.
ServLifts builds traction food dumbwaiters in Wujiang, Suzhou, China, and supplies them with the documentation an installer and an inspector both need. If the open question in your project is who installs it and what the building must provide, that is a conversation worth having before the purchase order rather than after the shipment.